I’m frequently asked how I managed over 140 paintings in the RV while on my nine-month Plein Air Odyssey. To limit weight, I travel with linen panels on either 1/8″ birch or 1/4″ gatorboard.
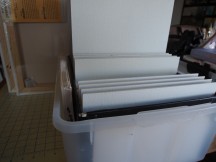
Fortunately, the RV has adequate storage in the exterior “basement” compartments, but the real secret is my drying boxes. I convert simple plastic storage totes that can be purchased in various sizes at any home center like Lowes or Home Depot. Make sure the sides are vertical, not angled.
I carry three boxes. One is for all panels with a 12″ side: 9″ x 12”, 8″ x 12”, and 12″ x 16”. Another handles panels with an 8” side: 8″ x 10″, and 8″ x 16″. The last accommodates 11″ x 14″ panels standing tall.
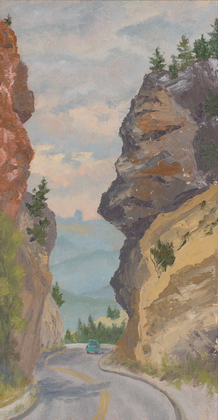
Although this limits the sizes I can store, I occasionally use a larger gatorboard-backed canvas for a specific requirement and then cut it down when I return home. For instance, this 7.5″ x 14″ painting was done on a 11″ x 14″ canvas that I was able to store easily in the 11″ box.In use, I find that by the time a box is filled, there are plenty of dry canvasses that can be either shipped home or stacked without damage.
Once you have your plastic totes, buy 1 to 2 large foam boards (depending on need), Gorilla tape (it’s important to use this brand due to its strength), 2 to 4 tubes of super glue gel, and a some four-foot lengths of ¼” square dowel rods from the lumberyard. You will need enough dowel rods to attach to the two opposing sides of each box.
Cutting the foam board and dowel rods
- I cut the gatorboard to equal the height of the sides of the box. Make the sides with the dowels ¼” larger than the canvas panels. Remember to factor the thickness of the foam boards into your calculations.
- It’s best if the foam board frame is about 1″ or so smaller than the plastic tote. I just put extra canvas panels in the empty space to keep it all from rattling around.
- Mark each gatorboard side with a line every ¾” (or whatever works for the thickness of your panels plus two dowel rods).
- Once I have the lines drawn on one side, I use it as a template to make an identical set of lines on the opposite side.
- Cut the dowel rods into pieces 1″ shorter than the height of the gatorboard sides. You will need enough to glue to the gatorboard on the 2 opposing sides, or approximately twice the number of panels that the box will hold.
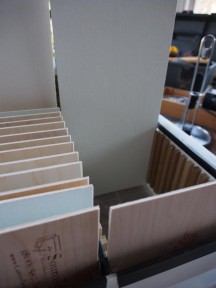
- Glue the rods to each opposing board, leaving a space of 1/2″ on the top and bottom. Make sure to account for room at both ends to attach the gatorboard ends to the doweled sides.
Attaching the sides of the foam boards together
- Use the Gorilla tape to put the foam board sides together–it’s easier to use a box cutter than scissors to cut the tape.
- Place the tape vertically—the same height of the foam board or a little shorter—into each corner on the inside, then the outside of each corner.
- Note: Once the tape touches the board it is difficult to move it so do just one side of the panel at a time. I find it easier to get it into the inside corners by first folding the edge of the tape about 2/3 length wise, sticky side out. Then attach the short side of the tape securely on the dowel side, butt the opposite corner and fold over the larger half of the tape to attach them together. Put the tape up to the edge of the first dowel.
- Repeat on all inside corners, then add more tape to the outside corners.
- Tape the top edge of the foam board, but only allow 3/8” on the inside edges so it doesn’t overlap onto the dowel rods.
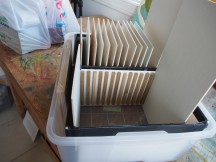
- You’ll notice that the 8″ box also has a foam board with dowels down the middle to make better use of the plastic box storage capacity. It requires a total of 4 foam board sides with dowels.
Slide the completed square into the plastic box. Put canvas boards at each end to strengthen the foam board square.
I was able to make three panel carriers in one day, once I got the supplies. These stress-free carriers allowed me to devote more of my time to actually painting without worrying about where to put drying canvases as we rolled along the way.
Happy trails…


